Android LinearLayout线性布局详解,
Android LinearLayout线性布局详解,
为了更好地管理Android应用的用户界面里的各组件,Android提供了布局管理器。通过使用布局管理器,Android应用图形用户界面具有良好的平台无关性。推荐使用布局管理器来管理组件的分布、大小,而不是直接设置组件的位置和大小。可以使用布局管理器嵌套布局管理器,即也可作为一个UI组件来使用。
LinearLayout可以控制组件横向排列或者纵向排列,内容不会换行,超出屏幕部分将不会显示出来。
学习图解

LinearLayout 常用XML属性及方法
【属性一】orientation 设置子组件的排列方式(单选)
XML: android:orientation="horizontal"

horizontal:横向排列
vertical:纵向排列
JAVA :linearLayout.setOrientation(LinearLayout.VERTICAL);
LinearLayout.HORIZONTAL 横向排列
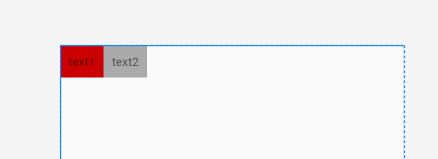
LinearLayout.VERTICAL 纵向排列

【属性二】gravity 设置子组件的对齐方式(多选)
XML: android:gravity="center"
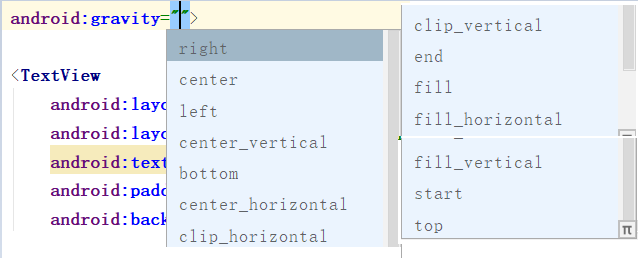
JAVA :linearLayout.setGravity(Gravity.CENTER);
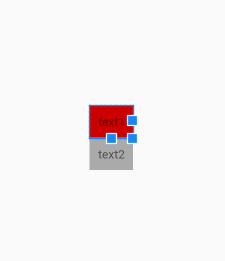
【属性三】baselineAligned 设置子元素基准线对弃,默认为true
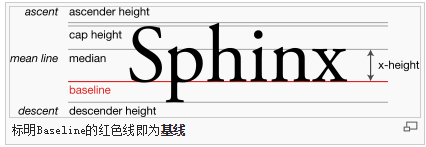
基准线:
打开的英语练习本,那条红线就是基准线

XML: android:baselineAligned="false"

JAVA: linearLayout.setBaselineAligned(true);
代码:true
    <LinearLayout
        android:layout_width="match_parent"
        android:layout_height="wrap_content"
        android:baselineAligned="true"
        android:orientation="horizontal">

        <TextView
            android:layout_width="wrap_content"
            android:layout_height="wrap_content"
            android:background="@android:color/holo_red_light"
            android:padding="20dp"
            android:text="text1"
            android:textSize="30sp">

        </TextView>
        <TextView
            android:layout_width="wrap_content"
            android:layout_height="wrap_content"
            android:background="@android:color/holo_blue_light"
            android:padding="10dp"
            android:text="text2"
            android:textSize="16sp">

        </TextView>
    </LinearLayout>
效果:
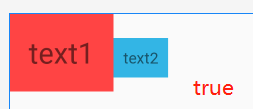
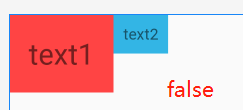
【搭配属性三】baselineAlignedChildIndex LinearLayout的基准线以他的第几个子元素为准,下标从0开始
一个LinearLayout 里面有很多 textview ,每一个 textview 都有自己的基准线,那么LinearLayout可能也是另一个LinearLayout的子元素,作为子元素 baselineAlignedChildIndex 就决定这他的一个基准线
XML:android:baselineAlignedChildIndex="0"
JAVA:linearLayout.setBaselineAlignedChildIndex(0);
代码:⭐注意内部的LinearLayout,后面将在 第二个LinearLayout上添加 baselineAlignedChildIndex ,搭配 baselineAligned="false" 使用
<LinearLayout
    android:layout_width="match_parent"
    android:layout_height="match_parent"
    android:orientation="horizontal">

    <LinearLayout
        android:layout_width="wrap_content"
        android:layout_height="wrap_content"
        android:baselineAligned="false"
        android:orientation="horizontal">


        <TextView
            android:layout_width="wrap_content"
            android:layout_height="wrap_content"
            android:background="@android:color/holo_blue_light"
            android:text="这是text2"
            android:textSize="20sp">

        </TextView>
        <TextView
            android:layout_width="wrap_content"
            android:layout_height="wrap_content"
            android:background="@android:color/holo_red_light"
            android:text="这是text1"
            android:textSize="30sp">

        </TextView>
        <TextView
            android:layout_width="wrap_content"
            android:layout_height="wrap_content"
            android:background="@android:color/holo_green_dark"
            android:text="这是text2"
            android:textSize="15sp">

        </TextView>
    </LinearLayout>
    <TextView
        android:layout_width="wrap_content"
        android:layout_height="wrap_content"
        android:text="这是text4"
        android:textSize="25sp"
        android:background="@android:color/holo_orange_light"
        >

    </TextView>
    <TextView
        android:layout_width="wrap_content"
        android:layout_height="wrap_content"
        android:background="@android:color/black"
        android:text="text"
        android:textColor="@android:color/white"
        android:textSize="15sp">

   </TextView>
</LinearLayout>
效果:


⭐ 总结
- 默认LinearLayout是没有基准线的,从图一和图三的对比可知。
- 下标从0开始三个子组件,最大index为2,超过2时布局将不显示
- 这个属性是用来决定当前LinearLayout的基准线时以哪个子组件为准的
相关文章
暂无相关文章
用户评论